
If you’re a new rider, one of the most rewarding experiences you can have is learning how to service your bike. Motorcycling isn’t just about riding—it’s about understanding and caring for your machine. The more familiar you become with your bike’s mechanics, the deeper your connection to it will be.
Beyond the satisfaction of hands-on maintenance, there are several practical benefits to changing your own oil:
- Cost Savings – You’re cutting out labor costs by doing it yourself.
- Hands-On Learning – You’ll get comfortable with tools, fasteners, seals, and how different parts of your bike work together.
- Self-Sufficiency – Knowing how to maintain your bike makes you more independent and prepared for the road.
- A Gateway to More Maintenance Tasks – Once you tackle an oil change, you might feel confident enough to take on other maintenance jobs—or even customize your bike.
So, let’s break it down and get you ready for your first oil change!
Why Does Your Motorcycle Need Oil?
Before jumping into the process, it’s important to understand why oil changes are essential. Engine oil plays a crucial role in keeping your motorcycle running smoothly:
- Lubrication – Your engine consists of numerous moving parts, including pistons, camshafts, crankshafts, and bearings. Oil creates a protective layer that reduces friction and prevents wear.
- Cooling – As your engine runs, it generates heat. Oil helps dissipate some of that heat, preventing overheating.
- Cleaning – Over time, tiny particles from engine wear get suspended in the oil. The oil filter captures these particles, keeping your engine cleaner and running efficiently.
Without regular oil changes, your engine can suffer excessive wear, overheating, and even complete failure. That’s why keeping up with oil changes is non-negotiable for a well-maintained bike.
When Should You Change Your Oil?
Every rider has their own opinion on when to change oil. Here are five common approaches:
- When it looks dirty – Many riders inspect their oil visually. If it looks dark and grimy, they change it.
- At the start or end of the riding season – Some prefer to change the oil before winter storage, while others do it at the beginning of riding season.
- At set mileage intervals – A traditional rule of thumb is changing oil every 1,000 to 3,000 miles, depending on your bike and riding habits.
- After every ride – This is common among dirt bike riders and track enthusiasts who push their machines hard.
- Following the manufacturer’s recommendations – The safest approach is to follow the schedule outlined in your owner’s manual. Manufacturers design these intervals to maximize engine longevity.
How to Change Your Motorcycle’s Oil
Now, let’s walk through the process step by step. While every motorcycle is slightly different, the basic process remains the same.
What You’ll Need:
Before you begin, gather the following supplies:
✔ The correct type and amount of oil for your bike (refer to your owner’s manual)
✔ A new oil filter
✔ A replacement drain plug gasket (if needed)
✔ A new oil filter O-ring (if required)
✔ An oil catch pan
✔ A wrench for the drain plug
✔ A strap wrench or oil filter wrench
✔ A torque wrench (if needed for reinstallation)
✔ Paper towels or rags for cleanup
✔ Protective gloves
Step-by-Step Guide
1. Warm Up the Engine
Start your bike and let it run for a few minutes. Warm oil flows more easily, allowing for a complete drain.
2. Drain the Old Oil
- Locate the oil drain plug (usually at the lowest point of the engine).
- Place the oil catch pan underneath.
- Use a wrench to loosen and remove the drain plug. Be ready for oil to flow out quickly.
3. Remove the Old Oil Filter
- While the oil drains, loosen and remove the oil filter using a filter wrench.
- Some bikes have an oil filter cap with bolts—if so, remove them carefully.
- Let any remaining oil drain from the filter area.
4. Clean and Prepare for Reinstallation
- Wipe the drain plug and the area around it with a clean rag.
- If your bike requires a new drain plug gasket or O-ring, replace them now.
- Lightly coat the new oil filter’s rubber seal with fresh oil to ensure a proper seal.
5. Install the New Oil Filter and Drain Plug
- If possible, pre-fill the new oil filter with a bit of fresh oil before installing it.
- Install the filter and tighten it securely (refer to the torque specifications in your manual).
- Reinstall the drain plug and tighten it to the recommended torque setting.
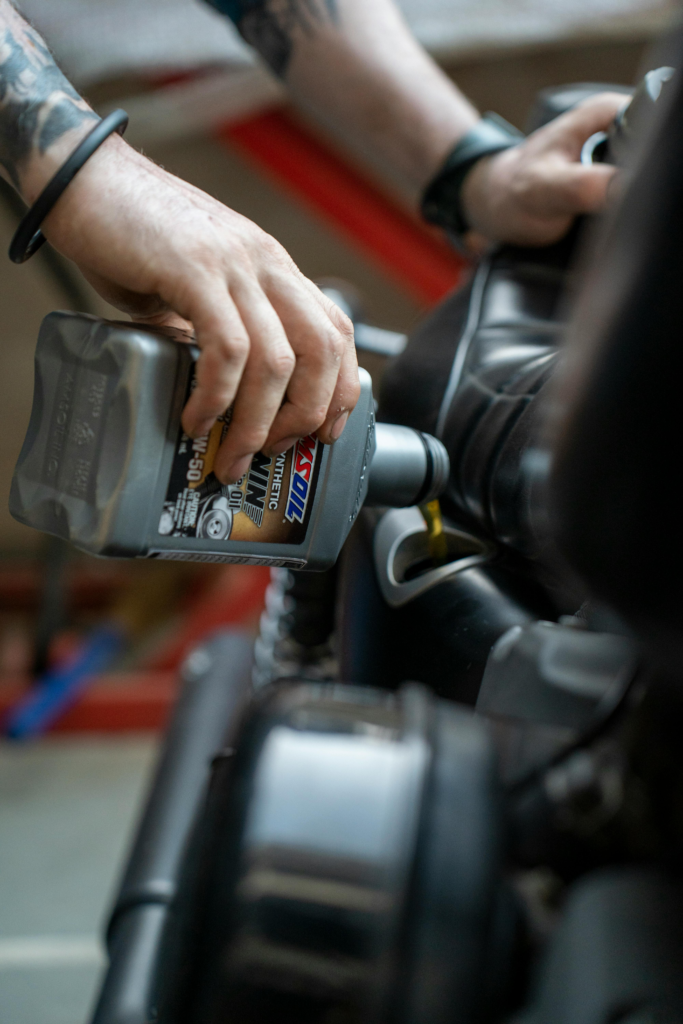
6. Add Fresh Oil
- Pour in the recommended amount of fresh oil.
- Start the engine and let it idle for a minute to circulate the new oil.
- Check for leaks around the drain plug and oil filter.
7. Check the Oil Level
- Shut off the engine and let the oil settle for a minute.
- Use the dipstick or sight glass to check the oil level.
- If needed, top it off until it reaches the correct level.
8. Record Your Oil Change
- Note the date and mileage so you know when the next change is due.
- Keep a maintenance log for your bike—it helps with long-term upkeep.
9. Clean Up and Dispose of the Used Oil
- Wipe down any spills and store your tools.
- Take the used oil and filter to a recycling center. Never pour oil down the drain or onto the ground.
Job Well Done—Now Go Ride!
At first, changing your own oil might seem like a lot of steps, but once you’ve done it a couple of times, it’ll feel effortless. Keeping the right supplies on hand makes future oil changes even easier.
Now that your bike is freshly serviced, there’s only one thing left to do—hit the road and enjoy the ride!
Have fun, stay safe, and enjoy the freedom of motorcycle camping!
📞 Call us anytime at 929-265-0526
📧 Email us at info@madtransponyc.com
Click here to get a free quote!